
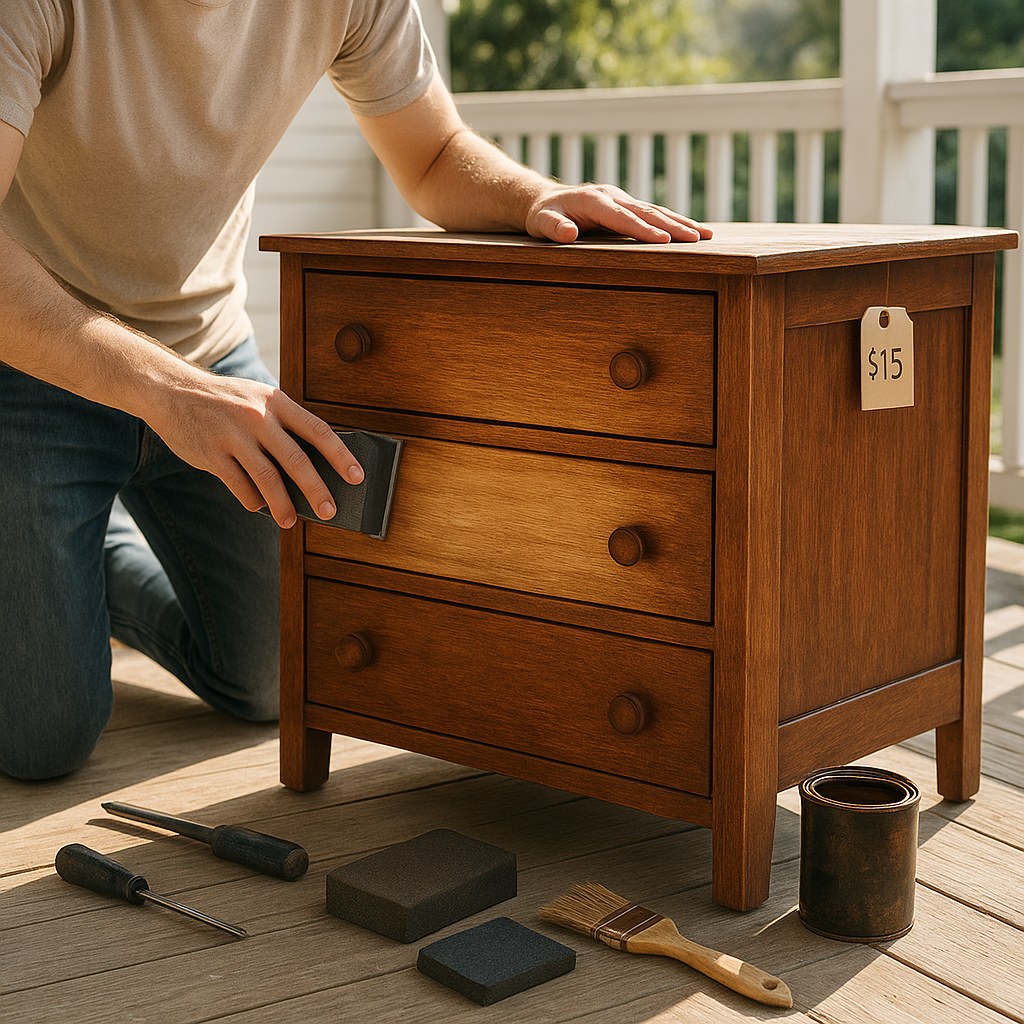
There’s something deeply satisfying about spotting a dusty, scratched-up wooden dresser at a thrift store for $30 and knowing—with complete confidence—that you can turn it into something that looks like it belongs in a design magazine. Secondhand wooden furniture restoration isn’t just a hobby; it’s one of the smartest ways to furnish your home without draining your bank account. With the average cost of new solid wood furniture climbing steadily (a decent oak dining table can easily run $800–$1,500 new), learning a few pro restoration secrets can save you thousands over time.
The best part? You don’t need a fancy workshop, expensive tools, or years of carpentry experience. Most of the techniques professional restorers use rely on affordable supplies, a bit of patience, and knowing which shortcuts actually work. Whether you’ve just hauled home a yard sale find or you’re eyeing that beat-up mid-century credenza on Facebook Marketplace, this guide will walk you through everything you need to know.
Why Restoring Secondhand Furniture Makes Financial Sense
Before diving into the how-to, let’s talk about the why. According to the Environmental Protection Agency, Americans throw away roughly 12 million tons of furniture each year. Much of that furniture is solid wood—material that’s far superior to the particleboard and MDF used in most budget furniture today.
Here’s a quick comparison that puts things in perspective:
- New particleboard dresser: $150–$400 (lasts 3–5 years)
- New solid wood dresser: $800–$2,000+
- Thrifted solid wood dresser + restoration supplies: $50–$150 total (lasts decades)
Older furniture—especially pieces made before the 1970s—was typically built with solid hardwood, dovetail joints, and real wood veneers. That construction quality is nearly impossible to find at affordable price points today. When you restore a secondhand piece, you’re essentially getting heirloom-quality furniture for the price of a pizza night.
Assessing Your Secondhand Find: What to Look For
Not every piece is worth restoring. Before you spend a dime on supplies, you need to evaluate what you’re working with. Professional restorers run through a quick mental checklist, and you should too.
Check the Bones
Flip the piece over, open every drawer, and give it a good shake. You’re looking for:
- Solid wood construction: Check drawer sides and the underside of tables. Solid wood feels heavy and shows grain patterns that continue over edges.
- Sturdy joints: Dovetail or mortise-and-tenon joints are signs of quality. Loose joints can be re-glued, but cracked particleboard usually isn’t worth the effort.
- Veneer condition: Don’t dismiss veneer automatically—many high-quality vintage pieces use beautiful veneer over solid wood. Small chips and bubbles are fixable. Large sections of missing veneer are more challenging but not impossible.
Deal-Breakers to Watch Out For
Walk away (or negotiate the price down significantly) if you find:
- Active woodworm or pest damage: Small holes with fine powder around them indicate active infestation.
- Significant water damage or rot: Press on any discolored or swollen areas. If the wood feels spongy, it’s likely rotted.
- Heavy mold: Surface mold can be cleaned, but mold that has penetrated deep into the wood is a health concern.
Essential Furniture Restoration Supplies on a Budget
One of the biggest myths about furniture restoration is that it requires a garage full of expensive equipment. In reality, a basic starter kit costs under $50 and handles the vast majority of projects. Here’s what belongs in your restoration toolkit:
The Must-Haves
- Sandpaper in multiple grits: Grab 80, 120, 180, and 220 grit. A multi-pack costs about $8–$12.
- Wood cleaner or TSP substitute: For removing decades of grime and old polish buildup. Around $8.
- Wood stain and/or furniture oil: Danish oil is a beginner favorite because it’s forgiving and enhances natural grain. Expect to spend $10–$15.
- Clear topcoat: Polyurethane (water-based for easy cleanup) or paste wax for a more traditional finish. $10–$18.
- Wood filler: For gouges, dents, and nail holes. A small tub runs about $5–$8.
- Steel wool (0000 grade): For smoothing between coats and removing fine scratches. Around $4.
- Tack cloth: Removes dust before finishing. Under $3.
- Old rags and brushes: Free if you use old t-shirts and cheap chip brushes.
Nice-to-Haves (Add Later)
- Orbital sander: Speeds up the process dramatically. A decent budget model costs $30–$50.
- Furniture repair markers: For touching up scratches without full refinishing. Sets cost $8–$12.
- Howard Restor-A-Finish: This product is a cult favorite in the restoration community for good reason—it can blend scratches, water rings, and minor finish damage without stripping. Around $10 per can.
- Chemical stripper: For pieces with thick, damaged finishes that need complete removal. Citristrip is a popular, less-toxic option at about $12–$15.
Pro Secret #1: Try Restoration Without Refinishing First
This is the single most important tip that separates pros from amateurs: always try the least invasive method first. Many pieces that look like they need full refinishing actually just need a good cleaning and finish restoration. Stripping and refinishing should be your last resort, not your first move.
Start With a Deep Clean
You’d be amazed what decades of furniture polish, grease, and grime can hide. Mix warm water with a small amount of TSP substitute or Murphy Oil Soap. Use a soft cloth or sponge to clean every surface, then follow with clean water to rinse. For stubborn grime in carved details, use an old toothbrush.

The Vinegar Method
One of the most searched-for restoration techniques involves an ingredient you already have in your kitchen. Mixing equal parts white vinegar and olive oil creates a surprisingly effective treatment for minor scratches and dull finishes. The vinegar gently cleans and slightly etches the old finish, while the oil nourishes the wood and adds luster. Apply with a soft cloth, work with the grain, and buff off the excess. This method works best on pieces with minor surface wear—not deep damage.
When to Use Restor-A-Finish
Products like Howard Restor-A-Finish occupy a sweet spot between cleaning and full refinishing. They contain a small amount of solvent that softens the existing finish just enough to blend in scratches, white water rings, and minor haze. You apply it with steel wool or a cloth, let it sit, and wipe off the excess. It’s available in multiple wood tones to match your piece. For furniture with an otherwise intact finish that just looks tired, this can produce dramatic results in under an hour for less than $15.
Pro Secret #2: Master the Art of Stripping (When You Must)
Sometimes a finish is too damaged, too thick, or too uneven to save. That’s when you strip. Modern citrus-based strippers have made this process far less unpleasant than it used to be.
How to Strip Furniture Safely
Work in a well-ventilated area—ideally outdoors or in a garage with open doors. Apply a thick, even coat of stripper with a cheap brush. Let it sit for the recommended time (usually 30 minutes to a few hours, depending on the product and finish thickness). The old finish will bubble and wrinkle. Scrape it away with a plastic putty knife, working with the grain. Use steel wool dipped in stripper for carved details and crevices.
After stripping, wipe the piece down with mineral spirits to remove residue, then let it dry completely—at least 24 hours—before sanding.
Pro Secret #3: Sanding Tips That Save Time and Money
Sanding is where most beginners either do too much or too little. Here’s the pro approach:
- Start coarse, end fine: Begin with 80 or 120 grit to remove remaining finish and smooth imperfections. Progress through 150 or 180, then finish with 220 grit.
- Always sand with the grain: Cross-grain scratches will show through your stain like a neon sign.
- Don’t over-sand veneer: If your piece has veneer, be gentle. Sanding through veneer is one of the most common beginner mistakes, and it’s very difficult to fix.
- Raise the grain: After your final sanding pass, wipe the wood with a damp cloth. This raises loose wood fibers. Once dry, do a final light sanding with 220 grit. This step prevents a rough finish after staining.
Pro Secret #4: Staining and Finishing Like a Pro
This is where your project transforms from “cleaned-up old furniture” to “wait, you got that WHERE?”
Choosing Your Stain Approach
For beginners, gel stains are incredibly forgiving. They don’t penetrate as deeply as traditional stains, which means more working time and more even color—especially on woods like pine that tend to absorb stain unevenly.
If you prefer a more natural, low-maintenance look, hardwax oils (like Osmo or Rubio Monocoat) penetrate the wood and create a beautiful matte finish. They cost more upfront ($25–$40 per can) but a little goes a long way.
Application Tips
- Apply stain with a clean rag or foam brush, working in manageable sections.
- Wipe off excess within 5–15 minutes (the longer it sits, the darker the color).
- Apply thin, even coats. Two thin coats always look better than one thick one.
- Let each coat dry fully—usually 24 hours—before adding another.
The Final Topcoat
Your topcoat choice depends on how the piece will be used:
- Water-based polyurethane: Best for high-traffic pieces like dining tables and dressers. Dries clear, resists water and heat. Apply 2–3 coats, sanding lightly with 320-grit between coats.
- Paste wax: Beautiful for decorative pieces. Gives a soft, warm sheen but needs reapplication every 6–12 months.
- Danish oil or tung oil: A middle ground—penetrates the wood, easy to apply, and easy to touch up over time.
Pro Secret #5: Quick Fixes That Deliver Outsized Results
Not every piece needs a full restoration. Sometimes a few targeted repairs make all the difference:
- Loose joints: Apply wood glue to loose joints, clamp overnight, and the piece is solid again. A $5 bottle of Titebond wood glue is one of the best investments you can make.
- Drawer sticking: Rub a bar of soap or paraffin wax on the drawer runners. This thirty-second fix works shockingly well.
- Dents and gouges: For shallow dents, place a damp cloth over the dent and press with a hot iron for 10–15 seconds. The steam causes the wood fibers to swell back into place. For deeper gouges, use wood filler, sand smooth, and touch up with stain.
- Musty smell: Place the piece in direct sunlight for a few hours, then wipe the interior with white vinegar. Set an open box of baking soda inside drawers overnight.
- Outdated hardware: New knobs and pulls can completely change a piece’s personality. Budget-friendly options run $2–$8 each and take minutes to swap.
Antique Furniture: When to Restore and When to Leave It Alone
Here’s a nuance many beginners miss: not all old furniture should be refinished. If you suspect a piece is a genuine antique (typically 100+ years old) or has significant value, stripping the original finish could actually destroy its worth. Collectors and appraisers often prize original finishes, even worn ones.
Before doing anything drastic to a potentially valuable piece, research the maker, look for stamps or labels (often found on the underside or inside drawers), and consider getting a free or low-cost appraisal. For pieces that are old but not particularly valuable—think mass-produced furniture from the 1920s–1960s—restore away without guilt.
Budget Breakdown: A Real-World Example
To make this concrete, here’s what a typical first restoration project might cost:
- Thrift store solid oak nightstand: $25
- Sandpaper multi-pack: $10
- Wood cleaner: $8
- Danish oil (natural): $12
- Paste wax: $9
- New brass pulls (2): $8
- Total: $72
A comparable solid oak nightstand from a furniture retailer would run $300–$600. That’s a return on investment that’s hard to beat—and you’ve gained skills you can use on every future project. This kind of smart spending is at the heart of living well on a budget without sacrificing quality or style.
Common Mistakes to Avoid
Learning from others’ errors saves both money and heartbreak:
- Skipping the prep work: Cleaning and sanding properly is 80% of a great finish. Rushing this stage guarantees disappointing results.
- Using too much product: Whether it’s stain, polyurethane, or Restor-A-Finish, thin coats always win. Thick applications lead to drips, bubbles, and uneven color.
- Ignoring dry times: Patience is non-negotiable. Applying a second coat before the first has cured properly can cause the finish to wrinkle, cloud, or peel.
- Working in a dusty environment: Dust particles landing in wet finish create a rough, gritty surface. Work in as clean a space as possible, and use tack cloth before every coat.
- Sanding veneer too aggressively: Once you sand through veneer, there’s no easy fix. When in doubt, hand-sand veneer pieces rather than using a power sander.
Where to Find the Best Secondhand Furniture Deals
Your restoration results start with your sourcing. The best places to find restorable wooden furniture include:
- Thrift stores: Goodwill, Salvation Army, and Habitat for Humanity ReStores often have rotating inventory at rock-bottom prices.
- Estate sales: Higher quality pieces, especially from older homes. Arrive early for the best selection.
- Facebook Marketplace and Craigslist: People frequently give away solid wood furniture when moving. Set alerts for keywords like “solid wood,” “vintage,” and “mid-century.”
- Curbside finds: It sounds unglamorous, but bulk trash days in established neighborhoods can yield incredible pieces that just need minor work.
- Garage and yard sales: Haggle respectfully—most sellers would rather take $20 than haul a heavy dresser back inside.
Conclusion
Restoring secondhand wooden furniture is one of those rare activities that’s good for your wallet, good for the environment, and genuinely enjoyable. The core principles are simple: start with the least invasive approach, invest in a small set of quality supplies, take your time with prep work, and don’t be afraid to make mistakes—they’re how every skilled restorer learned.
Remember the key takeaways: always try cleaning and finish restoration products before committing to a full strip-and-refinish. Use thin coats of whatever finish you choose, respect drying times, and be extra gentle with veneer. Source your pieces strategically from thrift stores, estate sales, and online marketplaces where solid wood furniture regularly sells for a fraction of its true value.
Your first project might not be perfect, and that’s completely fine. Each piece you restore builds your skills and your eye for quality. Before long, you’ll walk into a thrift store and see not dusty old furniture, but a room full of potential—and you’ll know exactly how to unlock it.